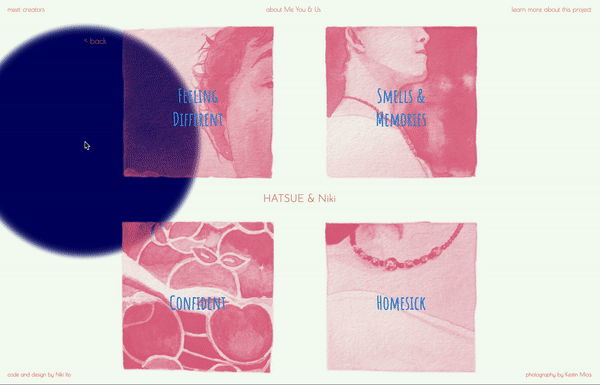
Utilizing Personal
& Collaborative Strength

I chose to incorporate illustrations since it is something I am very comfortable with. Although the process takes time, unlike coding it is something I can work on entirely by myself with confidence. I thought that including illustrated elements would bring further visual cohesion to the website as well as a sense of texture and authenticity.

I decided to collaborate with photographer and documentary artist Kestin Mica since I always knew that he enjoys working on creative and documentative photography projects. It is great to collaborate with other artists and create projects that are visually unique to that collaboration. With his collaboration, we were able to incorporate audio recordings and film photography.

Audio

  1. Obtain an audio recorder. (We used a Zoom H1n recorder.)
  2. Test the audio recording. (It is best to use headphones.)
  3. Find ways to record clean audio. (We recorded one indoors in a quiet room and another one outdoors with a wind muffler. I found it more difficult to edit out inconsistent noise such as people talking and cars parking.)
  4. Set a time to meet and record the conversation.
  5. Listen to the audio and take notes on the spoken topics.
  6. Organize topics and narrow down the ones to be featured. (I chose to feature four topics per conversation.)
  7. Use an audio editor to edit the audio. (I used Adobe Audition to first trim and compose an organized recording and later clean the background noise.)
  8. Create a transcript for each recording. (I used Google Docs.)

Photography

  1. Collaborate with a photographer.
  2. Communicate the desired style and feel of the photography. (I was looking for close-up images to show intimacy.)
  3. Take the pictures. (The photographer used a film camera which he later developed.)
  4. Edit and organize the photos to be composed with the appropriate topics. (I used Adobe Photoshop.)

Illustration

  1. Trace the photography. (I just attached a tracing paper on my computer screen. Tracing is a great way to achieve accurate composition in a shorter amount of time.)
  2. Use a light tablet or bright window to trace the lines onto watercolor paper. Add lost detail with a pencil.
  3. Choose one color and paint the thumbnails. (The color can be later changed using Adobe Photoshop.)
  4. Photograph the painting with a good digital camera.
  5. Use Adobe Photoshop to adjust brightness, contrast, and levels.
  6. Use the quick mask tool to get a negative and positive selection of the image.
  7. Attach the selection to a solid color layer to have flexibility with color choice.
  8. Export each image as a png with a transparent background.

Coding

The coding portion of the visual narrative website included using the p5.js editor and later moving them to a local development environment where I integrated the p5.js sketches onto a local website. The p5.js editor was used to create an audio visualizer, timed subtitles, and interactive images. I used GitHub to document changes and host the website. EventListener and namespacing were used to add further interactions between the JavaScript files and HTML files. I also used GitHub's Issue to post coding issues and contribute to open-source,

p5.js Editor

  1. See examples of p5 sketches with audio visualizations.
  2. Experiment and develop the code for the audio visualizers in the p5 editor.
    1. Study FFT analysis to convert audio into data points. (I watched this class by Danne Woo to get the basic code and example for FFT analysis.)
    2. Experiment with the FFT waveform and spectrum analysis.
    3. this is an animated gif image but does not move this is an animated gif image but does not move
    4. Develop the code for the finalized audio visualizer. (I simply took away the height veriable for the spectrum analysis and added a color variation.)
    5. this is an animated gif image but does not move
                                                  
              let myAudio, fft, img;
              
              function preload() {
                  myAudio = loadSound("smells.mp3");
                  img = loadImage("hatsue-10.jpg");
              }
              
              function setup() {
                  createCanvas(400, 400);
              
                  fft = new p5.FFT(0.9, 64); //Create a new FFT analysis
                  myAudio.play();
              }
              
              function draw() {
                  background(255);
                  image(img, 0, 0);
                  let spectrum = fft.analyze(); //spectrum analysis
              
                  noStroke();
                  for (let i = 0; i < spectrum.length; i++) {
                  let x = map(i, 0, spectrum.length, 0, width);
                  fill(spectrum[i] * 1.5 + 50, 173, 159, 80);
                  rect(x, 0, width / spectrum.length, height);
                  }
              }                                                                            
                                                  
                                              
  3. Plan and develop the code to time the subtitles with the audio in the p5 editor.
    1. Take the transcribed text and use an array to separate and store each chunk of text. Show the text using the variable index. (To learn about arrays, see this tutorial by The Coding Train.)
    2.                                         
      let subtitleArray = []; 
      let index = 0;  
      
      function showText() {
          subtitle.html(subtitleArray[index]);
      }
      
      function incertText() {
          subtitleArray.push("So I’m very attached to smells", "and so there’s a 
          lot of specific smells", "that I associate with many different things.", 
          "Like the bathroom in the beginning", 
          "it kind of smelled like my grandma’s bathroom"...);
      }                                         
                                              
                                          
    3. Use currentTime() mouseclicked() and console.log()to document the timing of the subtitles while playing the audio. Use the variable index to view and switch the text.
    4. this is an animated gif image but does not move
                                              
      // when the mouse is clicked, add 1 to the index and print the current time
      // of the audio track in the console.
      
      function mouseClicked() {
          index = index + 1
          console.log(myAudio.currentTime());
          }
                                              
                                          
    5. Store the documented time from the console in an array. (I just copied and pasted the numbers from the console while adding a comma after each time stamp.)
    6.                                         
      let subtitleCueArray = [];
      
      function incertCue() {
          subtitleCueArray.push(
          0,
          2.3684126984126985,
          4.969047619047619,
          7.865736961451248,
          10.419931972789115,
          12.718707482993198, ...)
      }
                                              
                                          
    7. Create a function that adds 1 to the index each time the audio's currentTime() exceeds the corresponding documented time which is stored in the array. (To learn about for loops, see this tutorial by The Coding Train.)
    8.                                         
      function timeSubtitles() {
          for (let i = 0; i < subtitleCueArray.length; i ++){
              if (myAudio.currentTime()>=subtitleCueArray[i]){
              index = i;
              } 
          }
          }
                                              
                                          
    9. See the final p5.js sketch with the subtitle function here.
  4. Plan and develop the code to interactively show groups of photos in the p5 editor.
    1. Use tint() map() and mouseX, mouseY to change the opacity of the image based on the cursor position.
    2. this is an animated gif image but does not move
                                                  
      // create a tint value for each image that shows the image when the cursor 
      // is at one corner and hides the image as the cursor moves away.  
      
      tint2 = map((mouseX)*-1+mouseY, width-100, 0, 255, 0);
      tint1 = map(mouseX+mouseY, 100, width, 255, 0);
      tint3 = map(mouseX+(mouseY)*-1, width-100, 0, 255, 0);
      tint4 = map(mouseY-(mouseX)*-1, width-100, 0, 255, 0);
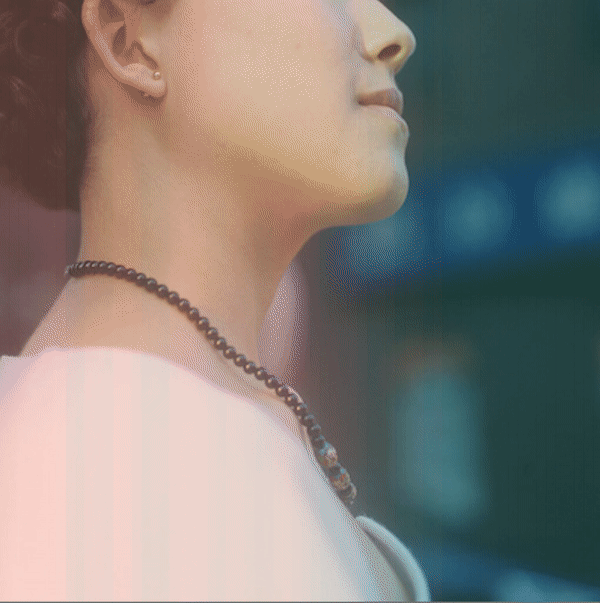
      
      tint(255,tint4);
      image(img4, 0, 0, width, height);
      
      tint(255, tint1);  
      image(img1, 0, 0, width, height);
      
      tint(255, tint2);
      image(img2, 0, 0, width, height);
      
      tint(255,tint3);
      image(img3, 0, 0, width, height);
                                                  
                                              
    3. The calculation for mapping mouseX, mouseY to a tint value between 0 and 255 was a bit tricky for me to understand. I ended up just guessing and seeing what works.

Website

  1. Set up a local development environment for the project.
    1. Use Visual Studio Code to create the development environment. (Creating p5.js sketches on a local environment instead of the p5.js editor allows larger files sizes and better organizations for bigger projects.)
    2. Create an account and a project repository on GitHub.
    3. Use GitHub Pages to host the website. (This is a great way to host a website for free and contribute to open-source processing.)
    4. Add a README.md to explain and organize the repository for viewers.
    5. Use GitHub Desktop to interact with GitHub from your local development environment. (You can see the changes you've made and push the commits to update the website on GitHub.)
    6. Create the basic structure of the website. (I created a main index.html, a script folder for JavaScript files, and an assets folder for audio, images, fonts, and CSS files.)
    7. Move the finalized p5 sketches onto the personal development environment. (Before moving the large finalized visual narrative p5.js sketch, I moved smaller p5.js sketches to get used to the process.)
  2. Create wireframes for the website.
  3. Create mockups for the design of the website. (I created over five different designs before arriving with the final design.)
  4. Use Google Docs to draft the texts for the website. (Using Google Docs allowed collaborative editing.)
  5. Code the website.
  6. Use EventListener to have the p5.js canvas show when a thumbnail is clicked.
  7. this is an animated gif image but does not move
    1. In the HTML document, add an id clickable-1 to the thumbnail element.
    2. In the JavaScript document, use .getElementById to select the id from the HTML document.
    3. Use .addEventListener to listen for when the id is clicked.
    4. Create and call the function showCanvas() to make the p5.js canvas visible when the canvas id is clicked. To do so, select the default canvas id name defaultCanvas0 and style the CSS to be visibility: visible;
                                        
    function setup() {
        ...
        document.getElementById("clickable-1")
            .addEventListener("click", showAndSwitchElementsForSketch1);
    
        document.getElementById("button-exit")
            .addEventListener("click",hideCanvas);
    }
    
    function showCanvas(){
        document.getElementById("defaultCanvas0").style.visibility="visible";
        document.getElementById("container").style.visibility="visible";
    }
    
    function hideCanvas() {
        pauseAnyAudio();
        document.getElementById("defaultCanvas0").style.visibility="hidden";
        document.getElementById("container").style.visibility="hidden"; 
    }
    
    function showAndSwitchElementsForSketch1() {
        showCanvas();
        display = 1;
        elementsForSketchArray[0].controlButton1();
    }
    ...
                                        
                                    
  8. Use instance mode aka namespacing to allow two p5.js canvases on one html page. (On the audio visualization page hatsue&niki.html, there is a p5.js canvas that appears in the foregorund but I wanted to add a p5.js canvas in the background to show the blue cursor object.)
    • Here is a tutorial by The Coding Train that I referenced.
    • Here are the files before namespacing. Below is a snippet of the code.
    •                                             
      function draw() {
          background(255);
          
          displayImgTimerSubtitle();
          //audio visualizer
          let spectrum = fft.analyze();
          noStroke();
          
          for (let i = 0; i < spectrum.length; i++) {
              let x = map(i, 0, spectrum.length, 0, width);
              let h = map(spectrum[i], 0, 255, 0, height);
              fill(spectrum[i] * 1.5 + 50, 173, 159, 80);
              rect(x, 0, width / spectrum.length, height);
          }
          
          }
                                                  
                                              
    • Here is the file after namespacing. Below is a snippet of the code. (I had to combine the separated script files in one file to use namespacing.)
    •                                             
      p.draw = () => {
          p.background(255);
          
          p.displayImgTimerSubtitle();
          //audio visualizer
          p.spectrum = p.fft.analyze();
          p.noStroke();
          
          for (let i = 0; i < p.spectrum.length; i++) {
              p.x = p.map(i, 0, p.spectrum.length, 0, p.width);
              p.fill(p.spectrum[i] * 1.5 + 50, 173, 159, 80);
              p.rect(p.x, 0, p.width / p.spectrum.length, p.height);
          }
          }
                                                  
                                              
  9. Post an Issue to document coding issues and contribute to open-source processing.

Resources

Conclusion & Next Steps

As a beginner coder, this was an amazing opportunity to continue learning and advancing in creative coding. I always find it incredibly helpful to have mentors and teachers who can guide you through having a better understanding of the processing environment. It was also a great experience to contribute to open-source processing and be a part of public discourse to solve issues and help the processing community.

This project has allowed me to have a better idea of what I could do with creative coding. Now I feel that another career path besides Graphic Design has opened up to me. I hope to continue creating collaborative projects with programming and further contribute to the open-source creative coding community.